User Interface
Navigation Bar
The Navigation Bar assists with viewing the design in different planes, magnifications and viewports. Drawing-assist tools such as grid settings are also controlled here.

Useful features in the Navigation Bar are :
Orbit
The Orbit tool allows the design to be examined from unconventional angles by rotating the design about a fixed anchor. A similar result is achieved by holding down the SHIFT key and moving the mouse wheel. The view is returned to its original plane by selecting the Home button in the ViewCube, shown below.
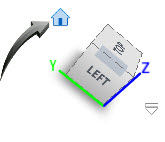
Look At
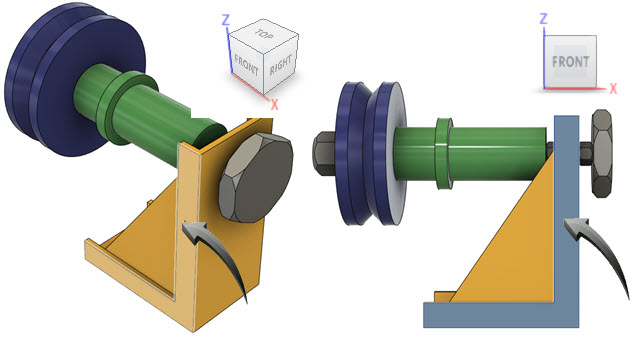
This allows a feature to be viewed by front-aligning the selected face. Where multiple faces are present, a choice can be made in the context menu.
In the example below left, the face indicated by the arrow is shown. The example below right shows the face aligned to the Front view.
PAN
This action slides the design around the workspace without changing the viewpoint. A similar action is achieved by long-pressing the mouse wheel and moving the mouse in the direction to where the design should be panned.
Zoom
This increases or decreases the magnification of the design without changing the viewpoint.
The magnification is decreased by sliding the cursor upwards.
The magnification in increased by sliding the cursor downwards.
A similar action is achieved by rolling the mouse wheel upwards (decrease magnification) or downwards (increase magnification)
Display Settings
The visual display of the design in the workspace is controlled through the Display settings. These studio-like visualizations represent different settings and environments for the design.
Useful features in the Display Settings are :
Visual Style : This determines how the design is rendered using Wireframe or Shaded options. Visible and Hidden Edges can be displayed or hidden.
Environment : This determines the Canvas background, allowing greater or lesser contrast with the design.
Effects : This displays shadows ambient occlusionAmbient occlusion is a shading and rendering technique which calculates how receptive each point on the surface of an object is to ambient lighting, allowing for the simulation of soft shadows under the effect of indirect lighting. and anti-aliasing tAnti-aliasing is a technique used to reduce edge and surface distortions which occur when high-resolution images are displayed at lower resolutions.o the parts of the design.
Object Visibility : This setting determines which features are visible or hidden in the workspace. When a feature such as Sketches is unchecked, then all instances of sketch geometry is hidden in the workspace. This setting is cascaded to the Browser, where the visibility of a sketch feature can updated independently.
Camera : The Camera provides a focal and target point for the scene from which to view the parts from different viewpoints. Camera options are Orthographic and Perspective.
Ground Plane Offset :
Grid & Snap
The displays a 2-dimensional grid surface with the major axis lines corresponding in color to the axes of the ViewCube. The grid rotates with the design during rotational orbit.
By activating the Snap to Grid option, the cursor will snap to the grid intersections until removed.
To remove the Grid or Snap setting, left-click onto the Grid and Snap option and uncheck these options in the context menu.
Viewports
This setting provides viewports with multiple viewing angles in the workspace. The original view is always shown in the upper right corner of the workspace. To return to a single viewport,, left-click onto the Viewports icon in the in the Navigation Bar and select Single Viewport from the context menu.
When the design is panned, zoomed or orbited in one or any of the viewports, the default views can be reset by left-clicking onto the Viewports icon and selecting Reset Views from the context menu.
related topics